A Quick Note (And a Warning) Before We Begin
This article on power wheelchair programming is not a recommendation or an endorsement of performing any of the modifications you’ll read here. This piece is for informational purposes only.
Altering the values set by the manufacturer should only be performed when necessary, and should only be performed with great care and to meet specific needs. Improper power wheelchair programming can be extremely dangerous.
Is your powerchair working exactly as you want it to? Is the steering responsive? Does it provide the level of speed you’re after?
For most folks, there’s at least one aspect of their powerchair they wish they could change. Here’s what you may not know: You can actually modify most of your powerchair’s settings if you know a bit about programming or if you have access to the right kind of programming talent.
In this article, we’ll spend some time exploring high-speed tracking technologies and the types of programmatic modifications you can make. Near the end of this piece, we’ll outline a number of fun projects that diehard DIYers have undertaken to radically change how their powerchairs work.
Sound good? Let’s take a closer look!
Tools of the Trade
Before you can make any changes at all to your powerchair, you’ll need some means of accessing the programmatic data that drives and defines how the chair works.
There are a variety of software solutions available, both for handheld devices and PCs. For instance, you can download a program like R-Net so that you can see exactly what variables you can change.
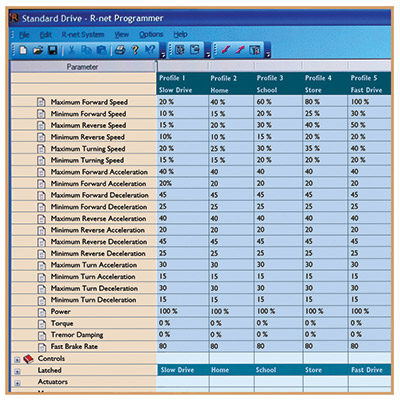
Broadly speaking, this sort of software falls into two categories: DME and OEM. DME is the software that dealers use to tweak or optimize the chairs they sell. OEM (Original Equipment Manufacturer) software is the stuff that the people who design and build powerchairs use to set them up initially.
R-Net is what you want because it makes a greater number of options available. OEM software typically gives you every option available in DME software, plus a bunch of other fun stuff.
Background: How Power Wheelchair Steering Affects Speed
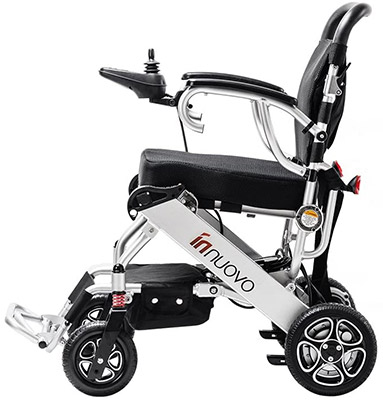
Power wheelchairs are different from most of the other vehicles you drive in because powerchairs aren’t normally mechanically steered via a steering wheel or handlebar directly linked to the wheels like a car or motorcycle.
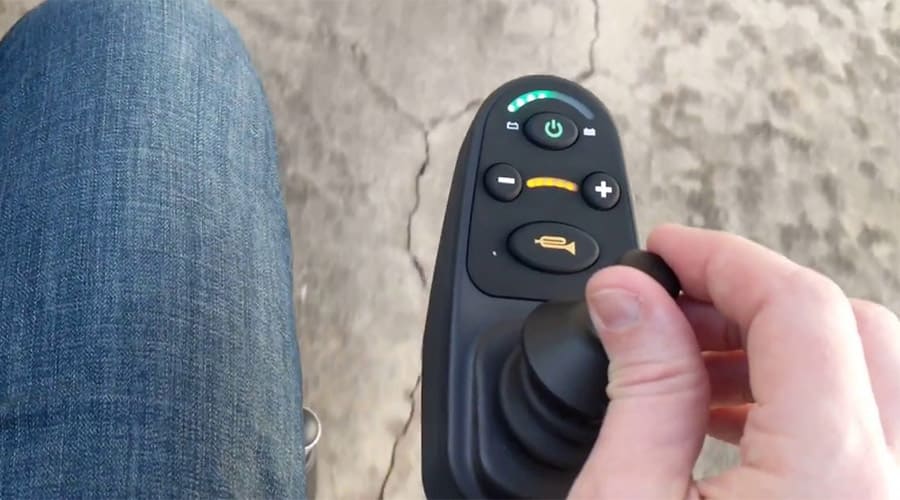
Instead, your trusty powerchair is overwhelmingly likely to be controlled via a joystick or, in some cases, a touchpad or similar. This control system is tied to two motors, one on each drive wheel. That matters because if you’re driving your chair and you execute a right-hand turn, what will happen is that the motor on the right will slow down relative to the motor on the left, and the chair will turn accordingly.
Think for a moment about what this means.
The only way your powerchair is going to maintain its absolute maximum speed is if you’re driving straight ahead. Even the slightest deviation, left or right, and your chair physically cannot maintain its maximum speed.
People With Mobility Issues May Not Be Able to Do That Easily

The unfortunate reality is that many people who suffer some mobility issue may not have sufficiently steady hands to keep their powerchair on the straight and narrow, which means that top speed is rarely achieved or maintained.
This is particularly true for people who suffer tremors and spasms, including but not limited to folks who have cerebral palsy, Parkinson’s, multiple sclerosis, muscular dystrophy, or similar conditions, which makes the problem more widespread than you might think.
Even if you don’t suffer from any of those, the simple realities of rough terrain can prevent you from maintaining top speed. After all, it’s hard to keep the joystick pointed dead ahead when you’re bouncing through a rough patch.
Okay, But What Can We Do About It?
If you want to be able to drive your powerchair at top speed while simultaneously ensuring that your chair is safe to ride around in and maintains smooth operation, the solution lies in taking a look under the hood.
In the world of powerchairs, what we really mean then is programming. Understand, however, that this is not something to be undertaken lightly, and it’s not for the faint of heart. With the right tools, or access to the right expertise, there are a number of changes and optimizations you can make that will radically improve the performance of your machine, but caution should be the order of the day here.
We’ll have much more to say on this topic in just a moment. But before we introduce you to the how, there is one more topic we need to spend at least a bit of time on…
How “Tracking Technologies” Don’t Correct for Joystick Movements
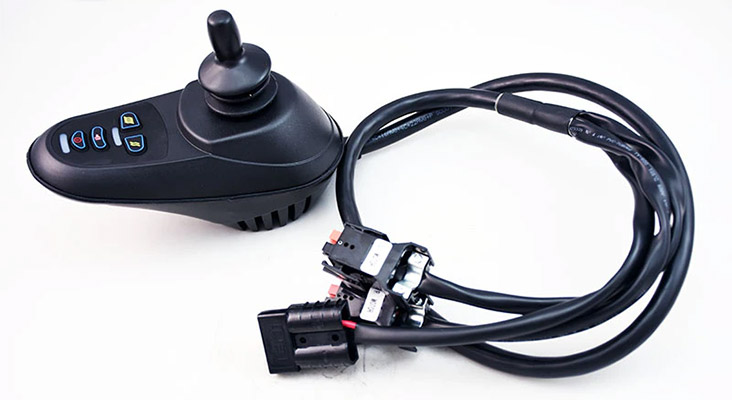
Many powerchair owners are of the understanding that high speed tracking technologies make a power wheelchair “drive straight.”
That’s true. Sort of. To a point. Specifically, it’s true only when your joystick is fully forward and dead center.
Where tracking technologies come into play is when the terrain is filled with obstacles or the land itself is uneven. In those cases, with the joystick dead-center-forward, the power to the motors automatically adjusts to prevent the power wheelchair from veering off course (and it’s especially used in “latched drives,” as with sip-n-puff or head switches).
The thing is that tracking technologies do not compensate for joystick movement. So if you’re driving your chair at top speed and your hand slips, causing the joystick to shift slightly to the left or right from dead center, your chair will still veer to the right.
Therefore, even if a power wheelchair features a tracking technology, high-speed programming optimization per individual needs still often must take place.
Putting High-Speed Programming Into Context
So far, we’ve been focused on top-speed handling for a power wheelchair and as such, the primary focus has been on high speed tracking.
The good news is that high speed tracking isn’t the whole story. There are a number of other aspects of your powerchair that can be programmatically controlled. We’ll take a look at some of those next, but remember, you may not find all of the options described below on your chair, and the naming conventions might vary slightly from one model to the next.
All that to say, don’t be surprised if the names used here don’t align perfectly with what you see when you peek under the hood. There’s bound to be some variance from one model to the next. That said, here’s a broad overview of what you might see when you start exploring:
Acceleration: This controls exactly what you think it controls, but it only applies to high speed acceleration (so, when you jam the joystick or other control mechanism all the way forward). You’ll find that it’s usually set in the neighborhood of 40 (max value is usually 100).
This won’t do anything to change your top speed, but setting the value higher will help you get to that top speed faster.
Deceleration: This is the opposite of the setting above, and again, it does exactly what you’d expect; controls the rate at which your chair decelerates.
Assuming a joystick-controlled chair, this value will kick in when you return the joystick controller to center post. Higher gives you more abrupt stops. Lower gives you a smoother, more gradual stop.
Turn Acceleration: This is one of a number of “safety feature” type settings used by manufacturers to keep people with limited driving experience from hurting themselves and potentially tipping their chairs over by taking turns too quickly.
This setting acts as a delay timer so that when you’re executing a turn, if you push the joystick forward to increase your speed, it won’t happen immediately. There will be a delay. Counter-intuitively though, at least on most models, a high number represents a shorter delay (with max—100—disabling the feature entirely.
If you want your controller to be truly proportionally responsive, you’ll probably want to disable this feature entirely. When you do, you’ll need to spend a bit of time re-training yourself to drive your chair because you’ve gotten used to the delay being there and will need some time to adjust if you’ve had it for a while.

Turn Deceleration: This is the flip side of the setting above. If you’re going to disable one, you’ll almost certainly want to disable the other, or you’ll be left with a frustratingly strange driving experience. Disabling it will make your controller proportionally responsive in terms of slowing or stopping, in the same way that the turn acceleration feature improves responsiveness when trying to increase speed.
It cannot be stressed enough that if you’re going to disable these two features, you’ll want to make sure you maintain a high degree of situational awareness at all times because your chair WILL RESPOND when you touch the controls. A careless bump of the joystick can lead to unintended consequences with these settings disabled!
Forward Speed: This should already be set to max (usually 100). The thing to remember here is that you can’t defeat the motors that come with the chair. At 100, you’ll get the top speed out of those motors. Anything less than that will act as a governor, tamping down the max speed.
Useful if you’ve got a machine with a higher top speed than you’re comfortable with (Say, if you bought something for your child and you don’t necessarily want him to be able to race around at 10 miles per hour now. But as he gets older, that would be fine).
Minimum Forward Speed: This does exactly what you’d expect it to. When you nudge the joystick forward, you’ll move forward. This controls the speed. On most models, this will be set in the neighborhood of 30, and relatively few people have much of a need to radically change it.
Maximum Reverse Speed: Again, this one does precisely what you’d expect it to. Most users don’t have a huge need for speed when traveling in reverse, so be careful playing with this one. Technically, you could set it to 100, which would allow you to travel at max speed in reverse. Practically speaking, controlling the chair with this value set much above 60 is a challenge.
Minimum Reverse Speed: This is the opposite of the setting above. If your chair travels too fast for comfort for you when moving in reverse, even at its lowest speed setting (barely a nudge from the joystick), this is how you’d correct for that.
Maximum Turning Speed: This is all about setting the rotational speed of the chair (as viewed from above). There’s no “right” answer here. At the end of the day, it’s all about performance, and that’s a highly personalized thing. You’ll want to test and experiment to find the value that works best for you, assuming you’re not satisfied with your chair’s current turning speed.
Minimum Turning Speed: This is the opposite of the setting described above. Again, this is very much a personal preference thing and comes down to lots of relentless testing until you find the value that works best for you.
Preset: Clicking here resets everything to factory defaults. If you’ve spent several hours tweaking your settings, avoid this like the plague. Useful if you’ve made a mess of things, though, and want to start over.
Sleep Timer: Many (but not all) models have a sleep timer built-in. Most users find this to be super annoying. If you’re one of them, this is how you disable that feature.
Joystick Throw: This is normally set to 100 (Max) and should be fine at that setting though if you have a very limited range of motion in your hands, you may want to tweak the value to see if you can coax better performance and responsiveness from the machine.
Steer Correct: This is a software-driven means of counteracting a problem where the machine tends to drift left or right. If there’s no drift, it should be set to 0, and if there’s no drift and you change the setting, you’ll introduce drift.
Ideally, the way to fix a drift issue is to repair the motor that’s malfunctioning and causing the problem. If you can’t do that right away, this setting can be used as a temporary quick fix to keep you riding until you can fix the equipment properly.
Read Timer: This isn’t anything you can change, but it measures how long you’ve had the chair in operation. If you ever need to know that, this would be where you’d go to find out.
Read Fault Log: This gets used by service techs who are trying to isolate problems you’re having and fix them. So if you ever start having trouble with your powerchair, you can come here and read through the log entries to see what kinds of errors your powerchair is throwing. That should help you identify the root problem and correct.
Hacking Your Chair
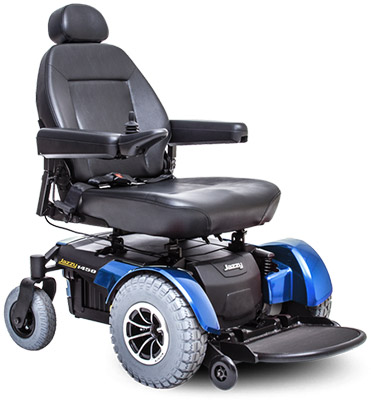
So far, everything we’ve talked about has been centered on reprogramming. As you can see, there are a lot of options available once you crack open the “behind the scenes” settings of whatever machine you’re using.
That, however, is just the tip of the iceberg. Once you start down that road, you may find yourself somewhat addicted to making changes and want to push the envelop even further. If you do, here is a quick overview of the kinds of crazy (and amazing!) DIY hacks that users have succeeded in performing on their own machines, which should serve as an inspiration for your own efforts.
Again though, we must pause here and reiterate the warning we gave at the start. Doing these kinds of hacks will almost certainly void your warranty, so keep in mind that this is presented for informational purposes only!
The first project to draw your attention to isn’t so much a hack as it is a total custom build. In this case, it’s a story of a father with limited funds wanting a powerchair for his son.
Since he couldn’t afford one, he got a little creative, rolled up his sleeves and went the DIY route. The story is both amazing and inspirational and the best part is watching his young son ride around on the creation, getting a feel for the controls. Pure magic!
While not nearly as inspirational as the example above, this Forbes article about a guy who hacked his powerchair so it could be remote controlled with an X-Box controller is a must-read!
The next several examples all come from the website “Instructables.com.” If you’re not familiar with it yet, once you spend a few minutes exploring it, you’ll be absolutely hooked. It really is one of the best sites on the web, where people from all over the world share their hacks and builds.
Naturally, there are a fair number of wheelchair hacks as well, including:
- A hack by Patrick Joyce to add an eye movement controller to his powerchair
- A wonderful project shared by Eric Brouwer to build a powerchair controller from scratch – This project came to be when a friend of Eric’s asked for his help repairing his electric wheelchair which had taken lightning damage.
- And here’s another end to end DIY electric wheelchair, shared by J. Taggard
- Have you ever wanted a wheelchair that could follow you around? Thanks to a contribution by RearLab you can do that! Their proximity hack gets it done!
- You know how most newer cars have a camera in the rear and a screen on the dashboard so you can get a better view of what’s behind you while driving in reverse? Well, here’s a clever hack and a bit of fabrication that gives you that very same capability on your trusty powerchair!
- Have you heard of an Emotiv or Ultracortex headset? These are headsets that record brainwaves and turn them into signals computers can sent to motors. This hack connects such a headset to a powerchair, enabling you to drive it with nothing more than the power of your mind. How insanely cool is that!
Best of all, the hacks mentioned here are just the tip of the proverbial iceberg. There are all sorts of fun things you can do and all sorts of interesting hacks you can make to improve or augment your powerchair. The only real limitation is your imagination!
Final Thoughts on High Speed Tracking and Power Chair Programming
Once you’ve been bitten by the reprogramming/hacking bug, you’re quite likely to come up with all sorts of ideas for how your powerchair could be improved. That’s true no matter how much you like the chair you’re currently using because no mass-produced product is absolutely perfect for everyone.
Only you can say exactly how you’ll use your chair, and as such, you’re in an ideal position to list the various ways in which your current powerchair leaves you wanting.
Put some thought into that and come up with a “Blue Sky” list of the things you wish you could change. Using this article as a jumping-off point, see how close you can get to your ideal with a few strategic hacks and a bit of reprogramming or high speed tracking.
If you decide to go that route, be careful, have fun, and best of luck!